FlyPad quick start
This guide takes you from a new system to your first recording and analysis in about an hour. Each step links to the full chapter of the user manual for details.
You need:
- the FlyPad basestation (Feeding Multiplexor v2), the arena modules and the USB cable
- a Windows 10/11 or Linux PC
- assay food, flies, a fly aspirator and a repeating pipette that dispenses 2 µL per press. We have achieved the best results with the Multipette® from Eppendorf.
1. Install FlyPad Acquisition
Run FlyPad_Acquisition_Setup_<version>_x64.exe and keep the option Install the FTDI USB driver for the FlyPad
ticked. On Linux, run the AppImage. See Installation.
2. Connect the hardware
Attach the arena modules to the basestation, then plug the basestation into the PC with the USB cable. Place the arenas on a level bench and make sure that the arenas are not in contact with each other. See Hardware setup.
3. Start acquisition and check the sensors
Open FlyPad Acquisition. On the Acquire page, the Port list shows the basestation as FlyPad; it is selected automatically. Click Connect, then Start acquisition.
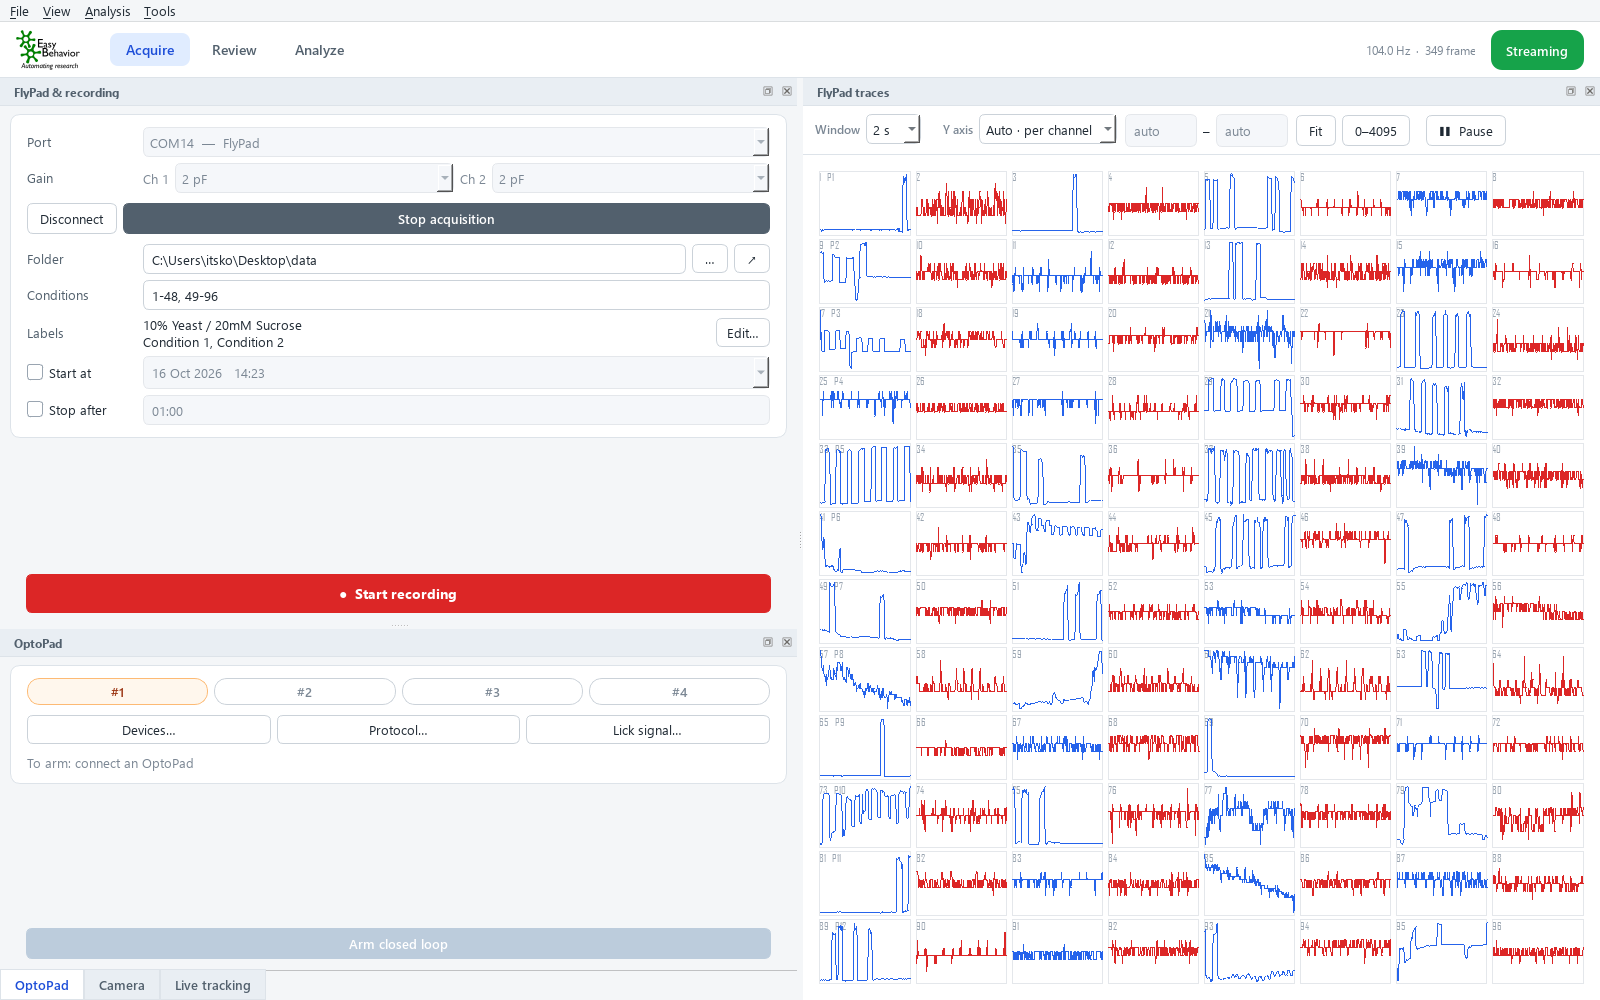
Every channel should show a trace. A flat line usually means food touches the top (gold) electrode. See Acquire.
4. Set up the recording
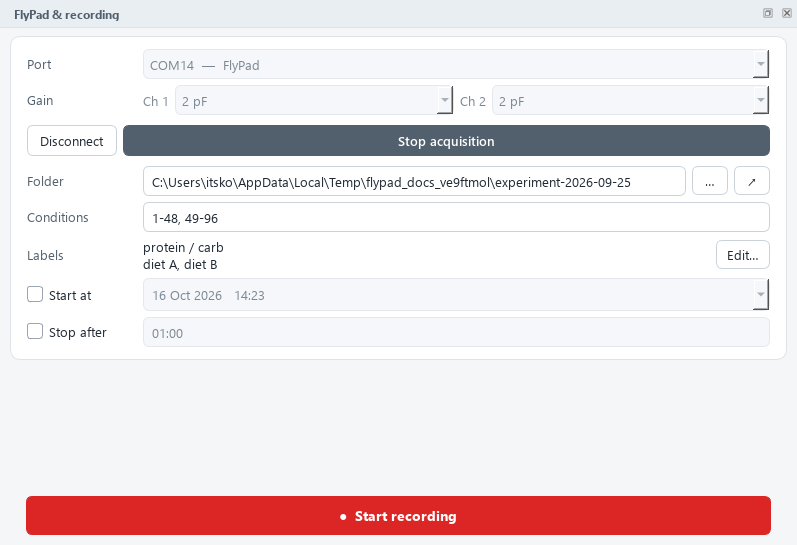
In the Recording card:
- Folder: where the data is saved; use one folder per experiment.
- Conditions: the channel range of each experimental group, e.g.
1-48, 49-96. - Labels → Edit…: the two foods (Substrate 1 = left, Substrate 2 = right) and a label for each condition.
- Tick Stop after and enter the length, e.g.
00:50for a 50 min assay.
5. Load food and flies
Warm the assay food on a heat block at 70 °C. Pipette the food into the left and right wells of each chamber, keeping it off the top electrode. Aspirate one fly into each chamber and slide the lid closed. Keep less than 10 minutes between loading the food and starting the recording. See Assay preparation.
6. Record
Click ● Start recording. The card shows the elapsed time, the frame count and when the recording stops. With Stop after, it stops by itself. Keep the arenas dark or dimly lit.
7. Optional: optogenetic stimulation (OptoPad)
Click Devices…, tick the OptoPads you use and Connect them. In Protocol…, choose closed loop (lick-triggered) or open loop (timed), then click Arm closed loop. See OptoPad.
7b. Optional: video and live tracking
With a camera connected (Camera card → Find, Connect), every recording also records a synchronised video. Draw the arenas once (Live tracking → Arenas…) and click Start tracking to follow each fly while you record. See Video and live tracking.
8. Review the recording (optional)
Usually there is no need to go there, but if something looks suspicious, Review lets you replay and scroll through the raw data. Switch to Review, click Open recording… and scroll through the data. Check that every arena behaved normally. See Review.
9. Analyze
Click Analyze this recording →. The setup wizard opens with the data folder and your labels
already filled in. Check the settings and click Finish. Plots and Excel tables appear in the
Analyze page, and everything is saved to figures and datasheets in the data folder. See
Analyze.
10. Clean up
Push the food out of each well with a pipette tip or a wooden toothpick. Wipe the arenas with lint-free tissue lightly dampened with distilled water, including the underside, and let them dry completely. You can use ethanol on the board, but keep it off parts made of plastic: acrylic is not resistant to ethanol. If you use ethanol, dry the boards completely, as quickly as possible, with a paper towel.